Tuesday, December 18, 2012

It's been almost a year....I'm still cooking so read this.

Being Tyler is back!  It's been almost a year since my last post about smoking some ribs and shoulders and chicken and stuff.  Where have I been you ask?  Hmm, let me go back to last February.........

February 14th - Valentine's day came and went like a winter's wind.

February 28th - Probably went to work that day, unless it was a weekend, then I didn't.

March 26th - Got my real estate license

April 10th - Started working for Dick Lepine Real Estate

July 20th - I turned 35.  Still alive.

Aug 1st - Started a new job at Sybase/SAP - Tech support engineer - Still talking to the customers so the other engineers don't have to.

Sep 10th - Resigned from Dick Lepine real estate.  I didn't sell shit. 

Sep 22nd - Joined the Usual Suspects Band. 

Oct 31st - Halloween bitches!

Dec 18th - Today I decided to start the blog again!

Man, it's been a busy year!  So this will be a quick little blog about smoking some corn beef.  Let me just preface this with that I was supposed to smoke a beef brisket for my drummer's Chanukah party.  Once he found out I was a fellow meat smoker, I was definitely in the band.  Before that, he had his doubts about my sax skills.  But unfortunately my daughter came down with pneumonia last week and my pregnant wife was sick as well so I was unable to smoke the brisket or go to his celebration.  So come Saturday, I had meat smoking on the brain and any meat smoker knows that when you get the itch you need to scratch it!  So off I went Saturday afternoon in search of a brisket!
 
I tried to find a brisket but Walmart was sold out.  Yes, I buy my brisket at Walmart.  $2.58/lb for a whole brisket.  Can't beat those prices.  Maybe I am supporting the man that puts the workers down, but come on people, $2.58/lb!

Anywho, after driving to Tewksbury and then Salem, NH, there was no brisket to be found.  Could have been because all the Jews bought them for Chanukah (I always spell Chanukah with a C because it gives it that authentic feeling when you pronounce it in your head.  The I'm choking on a walnut and can't get it up "Ch" sound.  If you use the H, I don't trust you or your beliefs.)

So no brisket was to be had.  Then I see the corn beef brisket and thought, why not just toss that in the smoker.  It's beef, it's brisket, it's corned.  Corned is a weird term.   I looked it up recently and it has nothing to do with corn.  Has to do with the size of the salt kernels used to brine/preserve/flavor it.  I think I might have written about this in a previous blog but in case this is your first time here, I had to bring it up.  Apologies for wasting your time to all my 12 dedicated followers.

Alrighty then, let's get cooking!

I bought a point and a flat brisket.  Flat doesn't have much fat, whereas the point has more fat.  More fat is always better for smoking so I had my doubts on the flat.  Rinsed them off a bit and coated them with a little olive oil and bbq rub.

Point on the left and the flat on the right.  Could also call them rectangle on the right and not rectangle on the left. 
Got the old electric smoker up to 220 degrees and tossed these bad boys on in there.

File photo of my smoker at my house from a previous smoke.  Smoker has been moved to the new patio which I installed sometime between then and now.


Imagine the smoker in the top left of the patio, in front of the outlets. 


Last time I smoked a brisket it took about 15 hours so I wasn't sure how long these would take considering they were smaller.  I started around 5pm Saturday evening and took them out around 4:30am.  Yep, I woke up around 4:30am cause I kept having BBQ dreams.   Weird disturbing BBQ dreams.  I'll let all of you take your imaginations to those dark creepy places because whatever I write will not compare.  I know you people.

So out of the smoker after close to 12 hours when the temperature of the meat registered around 185-195 degrees.  I wrapped them up in two layers of foil, popped them in a cooler, and went back to bed for a couple more hours of BBQ free dreams.

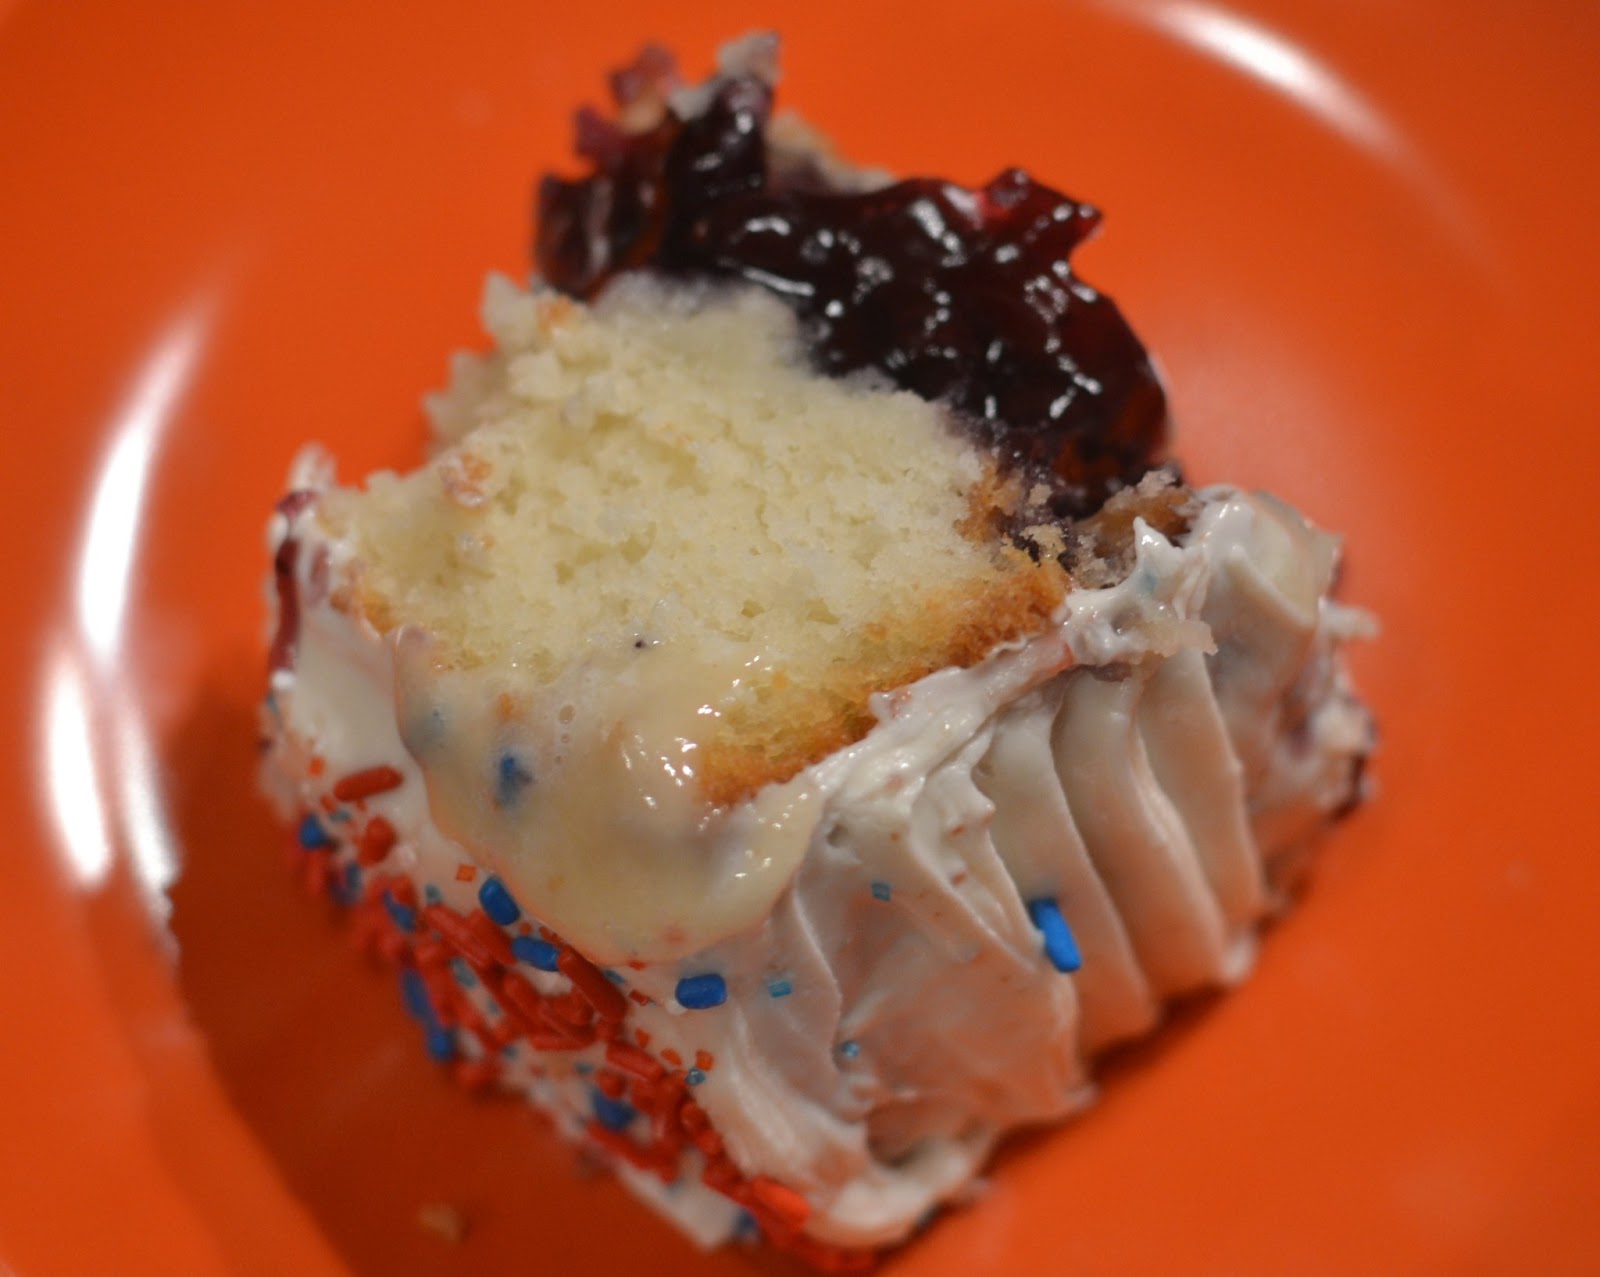
Morning came too quickly, probably from Ally waking me up.  It was like Christmas morning, or what I imagine Christmas morning to be like.  (Since I'm Jewish, I wouldn't know.   Chanukah evening doesn't have the same feeling.  Trust me.)   Knowing that downstairs, there awaited 6 lbs of Mesquite smoked corn beef for my pleasure or breakfast. Yep, I sliced that baby up and made myself a side of corn beef with my eggs over easy and piece of Challah bread!

Also seen here is a clementine and a cup of coffee in a Disney evil mug.  And that's a halloween plate.  Yep, a Halloween plate in December.  Why only use it one time a year. 


But I'm jumping ahead of myself.  I unwrapped the corn beef like a present and I was happily surprised to see a nice blackish, brownish smokey bark.  The sweet, smokey, woody smells soon enveloped my nostrils and permeated their way through the house.  If this was a cartoon I would have floated in the air and followed the smell around the kitchen.


Sliced point of corn beef.  Wish flash on.

  
Sliced point of corn beef close up with no flash.
 
On a taste scale I'd say it was a bit on the salty side.  Probably due to the corning process.  Definitely helped by having it with some mustard or bbq sauce.  The flavors and tenderness of the meat were pretty sweet.  And by sweet, I mean awesome, and not sweet like candy.  Even though I'd choose this 10 days out of 10 over candy.

Just be warned that if you decide to smoke a corn beef, it will be awesome but it won't be a real BBQ brisket.  That will have to be made at a later date and later time when the stars are aligned, my family is not sick, and I can find a whole $2.58/lb brisket at the Walmart. 

Special thanks to drummer Dave for bringing me over some of his smoked brisket, ribs and latkes from his party.  I hope to repay the kindness in the near future.


 Next up :  Who knows?  This only Tyler recipe thing is pretty tough so it's just an everything cooking food blog now.


This blog has been brought to you by Two Allys.


Tuesday, February 7, 2012

Taking a break from the Tyler Recipes - BBQ anyone?

I've decided to take a break from just blogging about Tyler recipes but didn't want to start a new blog and risk losing thousands of loyal followers, so from now on you can read about everything I'm cooking.  That was a long sentence and probably a run on but since I'm no longer in school and not being graded, I'll continue to put as many thoughts as I want into once sentence, just seperating them with commas and the occasional semi or regular colon; henceforth and not withstanding furter addendums that may arise as I type about whatever I damn well please.

My love of BBQ started at the young age of 9 when I spent a summer working on a farm in South Carolina.  It was Camp Farm Summer BBQ!  Every friday night we'd gather around the old oak tree, sing songs, and eat bbq.

Old timey clothes were optional but since everyone else was wearing them, I decided to play along.


 Okay, I never went to summer farm camp when I was 9, it was when I was 13.   But seriously, I never went to this camp and I just made up the whole thing.  But it sounds pretty awesome so maybe I'll start a BBQ summer camp someday.  Until that day happens, I'll just do it in my backyard.

A few weeks ago I bought myself a smoker.  I researched the brands, types and finally decided on the Masterbuilt Electric Smoker with built in meat probe!  Meat probe is a fun word to say.  I dare you to say it a few times without laughing.


There's my new baby!  About the size of a tall mini fridge.  Propped it up on some old bricks I found around the house. 

Now the BBQ purists out there will look down upon me for buying an electric smoker.  It still uses wood, but no charcoal so it's probably the equivalent of using a gas grill instead of charcoal one.  I chose the electric due to it's convenience factor (maintains temperature) and ease of use.  Pop in some chips, fill the water pan, set the temp and time and you're good to go!

With the smoker heating up, it was time to prep the meat.  I started with an 8lb pork butt (not from the butt of the pig, but the shoulder.  Why is it called butt then?  Not sure and don't care.  Moving on).

Notice the nice marbling of fat and meat.  You want to get a nice fat to meat marbling going on in there.  It keeps the meat juicy while cooking.
I decided to use this recipe that I found googling around the web.

http://www.virtualweberbullet.com/pork4.html

Maybe it was the championship in the title that got me or the great pics.  I hate recipes with no pics.  How do you know it came out well if you have nothing to compare it to?

So I first mixed up the dry rub and injection solution.


Now comes the fun part of trimming the fat cap off the pork.  It's actually pretty gross so I won't go into detail.  Some recipes say to leave it on but I like the school of thought for taking it off so you can get more rub on the meat.

I'm glad this one came out blurry but you get the idea.


Kitchen scissors work well for getting under the fat cap.  Snip Snip. 
Note:  Plaid flannel shirt not required, but recommended attire for cooking BBQ.

After trimming it, you inject it with the solution and then rub it down with the rub.  

Rub a dub dub, bring on the grub.

   Now place it in the smoker and wait, and wait and wait and wait.  Depending on the size and temperature (I cooked between 220 and 240) you can expect it to take between 8-12 hours.  During the cooking process I occasionally added more wood (used Cherry wood) and sprayed the meat with apple juice.

After about 4 hours.  Meat probe nicely inserted.  Make sure it's not touching the bone. "Keep your meat probe off my bone," said the pork butt as I gently inserted the probe.
   
The important thing is that you have to cook it to at least 190 degrees.  I used the built in meat probe (hehe) as well as an instant read digital thermometer.  I ended up cooking it a little over 190 but it didn't seem to make a difference.

And here's what it should look like when it's done.

That is a work of bbq art!  I've already made it my desktop background and ordered a poster print for my office wall.
While it's still hot, you can slice it or shred it up.  Make sure to use large forks, meat paws, or insulated gloves.  I used gloves which worked marvelously.  It should come apart easily and the bone will slide out.  If not, then it hasn't cooked long enough or our meat probe/thermometer is wrong.

Pulled pork! 
Eat it plain, mix it up with some sauce or put in on a bun and have yourself an awesome sandwich!

Ate this at 11pm.  Had to try it hot out of the smoker.  Also tasted good reheated the next day.
As my first foray into the world of real slow smoked BBQ, I was very pleased with the results.  Had a mild smokey flavor, tender juicy meat, and delicate mix of sweet and spicy bark.  Being a certified BBQ judge (see pic below),

Certified Barbecue Judge (CBJ) # 62178 reporting for duty!

I've been trained (took a 4 hour class) on the art of tasting and evaluating bbq.  And on a scale of 2-9 (9 being the best) I'd say this rates at a 8 for appearance, 7 for taste, and 7 for tenderness.  It was excellent but there is always room for improvement.

I also cooked up some ribs,

3 racks of Baby Backs courtesy of the neighbors via Alpine Butcher.
  
chicken,

Drumsticks with a basic rub smoked in Hickory.
 
John Legend's mac and cheese,

http://www.marthastewart.com/348566/john-legends-macaroni-and-cheese
    

and collard greens,

  http://www.foodnetwork.com/recipes/paula-deen/collard-greens-recipe/index.html


for the big game on Sunday.  Even though our team didn't win (and I'm just getting over it now), I still enjoyed a wonderful dinner with our neighbors. 


Special thanks to Sam, Jules, Monica and Jason for sharing in this BBQ feast.  The first of many to come!


Coming up next:   Whatever I feel like making.  Any suggestions?

Friday, January 27, 2012

Special Non Tyler Blog #2 - The Pie Cake!

So it's been a while since I've written a blog and people have been asking when's the next blog, I need more Tyler recipes, and so on and so forth.  Well here I am, ready to go in 2012.  The end of 2011 was busy with selling my condo and buying a home and then moving to the new home and then the holidays came and then and then and then.  I can go on and on and keep making excuses but the reason you're reading this is to find out how to make the incredible edible pie cake!


Yep, there it is!  A cherry pie inside of a chocolate cake.  Cherries and Chocolate!  As American as Peanut Butter and Jelly, the Statue of Liberty, or the Liberty Bell.  Actually Cherries and Chocolate were probably put together by some french pastry chef in 1842 but we'll leave it at that unless you want to go investigating it.  And if you do, please leave me a comment so we can set this straight. 

I got this idea from this article where they made a 3 layer pie cake extravaganza.

http://www.charlesphoenix.com/2010/10/cherpumple-monster-pie-cake-new-test-kitchen-video/

Pretty impressive and I'm sure it tastes amazing or at least full of lots of flavors.  Since I'm not an accomplished baker I decided to just attempt one level.  This chocolate cherry which I will not refer to as "Chocher".  Actually that sounds like a British novelist.  Let's go with "Chercho."  Hmmm, now it sounds like a mexican dish.  How about "the pie cake?"  I like that.  Simple, yet to the point. 

So this is not the first attempt at the pie cake.  My first was a vanilla cake with a blueberry pie inside.  I didn't cook it long enough so when you cut into it, the whole thing sunk in the middle like a cave in.  It still tasted good once you cut out the non-cooked parts and it ended up looking like a coffe ring cake.

Made this around 4th of July, hence the decorations.  Notice the sloppy middle.  Looks like a melted ice cream cake. 


Blueberries and vanilla.  A match made in my kitchen. 
So there was take 1.  It turns out I needed to cook the pie cake much longer you cook a normal cake.  Guess it has something to do with the inside being a pie or something like that.  But we'll get into that soon enough. 

Alrighty then, let's get crackin on how I made it and how you at home can make your own pie cake. 

Ingredients :

1 box of cake mix (I can't remember the brand I used but any will work)
(whatever the cake mix calls for...probably eggs and oil)
1 cooked pie (room temperature)
1 jar of frosting
Decorations for the cake

Supplies:

9" round spring form cake pan
Non stick cooking spray with flour

So it's a pretty simple list.  If you want to go ahead and make your own cake and pie from scratch, by all means knock yourself out.  I just wasn't feeling that ambitious nor had the time or patience. 

Start by following the directions on the cake mix.  Spray the inside of the pan with the non stick spray making sure the get the sides as well.  (Side note:  Do they make "stick" cooking spray?  Isn't the point of cooking spray to be non-stick?  Seems redundant having to call it non-stick cooking spray.)

Next pour about 1/4 of the mixture into the cake pan.  Just enough to get a nice layer on the bottom.


Next remove the pie from it's container and place at the bottom of the cake pan like so:

Be careful as it's easy for the pie to fall apart if not handled with care.  Pretend it's a baby you are putting down to sleep.  Be gentle with the baby or it might wake up and you need your rest and time to yourself, so don't wake the baby. 


This is what happened to my first attempt when I wasn't careful with the pie.  Might have also caused the final product to be somewhat or a disaster since the cake batter mixed in with the pie filling.  If possible, use a pie that doesn't have holes or lattice work on the top. (See cherry pie above)


Press it down a little so it goes into the batter but not too much so it hits the bottom.  If you do, not a big deal but the goal is to get the pie in the cake, not have a cake on top of a pie. 

Now pour the rest of the batter over the pie and make sure it's level before putting it on the oven.

Use the temperature on the cake box but forget about the cooking times.  This is where I went wrong the first time.  I think it was supposed to take 30-40 minutes and after an hour of testing it still wasn't solid on top.  Make sure to cook until the entire cake is done.  Probably closer to 90 minutes but keep checking on it.  Use the toothpick test, stick it in the top and when it comes out clean you are good to go. 

Finished cooking in the oven.  The cake looks a little strange on top and it cracks in places.  Nothing a little frosting can't hide. 
Remove the cake from the pan and let it sit for 30-45 minutes before frosting.  You don't want to frost a hot cake. 

Use a spatula and start in the middle, working your way to the outsides and then finally around the sides.  It's really an art form and since I've only done it a few times, you might want to watch a video or read how a professional does it. 

Finally, decorate with sprinkles or whatever suits your fancy.  Here's the finished cherry chocolate pie cake!


Coming up in the next installment:

BBQ - the real way, low and slow.   I recently bought a smoker and can't wait to give it a go.  Ribs, Pulled Pork, Chicken, and maybe even a brisket!