Thursday, September 15, 2011

Special Non Tyler Blog #1 - The Bacon Explosion!!!!!!!!!!!!!!!!!!!!!!!!!!!!!!!!!!!!!!!!


Yep.  There it is.  Bacon wrapped sausage wrapped in bacon with a touch of bbq rub and bbq sauce.  I am salivating just typing these words and looking at the picture.  If you're wondering where I got the recipe for this, head over to http://www.bbqaddicts.com/blog/recipes/bacon-explosion/

It's very easy to make and a lot of fun, so sit back and read or run to the store with your bacon list and then come home and follow along.  It is advised to print out the recipe so you don't get bacony stuff all over your computer, ipad, iphone, or whatever new fangled device is now the rage if you're reading this in the future.


Everything you need to increase your cholesterol!  Thick cut bacon (don't even think about buying the wimpy stuff cause it will fall apart and make you mad.  This recipe will only make you happy).  Italian sausage - I went with the sweet.  If you like it hot, go hot or maybe mix it up.  BBQ seasoning and BBQ sauce. 

So there you have the ingredients.  Pretty simple and can all be purchased for around $15-$20.  The first step is the to get your area ready.  Lay out some aluminum foil on a cookie sheet. 

Random thought interjection - Is tin and aluminum the same thing?  Some people say tin foil and others say aluminum foil.  What's up with that?   Time to check wikipedia......

Tin foil, also spelled tinfoil, is a thin foil made of tin. Actual tin foil was superseded by cheaper and more durable[citation needed] aluminium foil after World War II, and aluminum foil is sometimes confused with "tin foil" because of its similarity to the former material.[citation needed]


And there it is.  So I was using aluminum foil.  Now it's time to work on your basket or bacon weaving skills.  Make a 5 x 5 or 6 x 6 weave of bacon on top of the foil.

That's a nice looking weave!  Make sure it's tight with no space between the bacon.   I could just stare at this for hours.  New desktop background!

After you are done admiring your excellent weaving skillz, you can sprinkle the seasoning or rub on top.  Next you want to lay down the sausage like a blanket over the bacon.  If you bought sausage in the casing you have to remove it from the casing first. 

A sausage blanket!  Make sure its all the same thickness and bring to about the corners of the weave. 

Probably should have mentioned this earlier but I forgot so here it is.  Take the leftover bacon and cook it in the oven or a pan.  I prefer the oven because it doesn't make a mess and you can get it real nice and crispy which is the way you want it for this step.  But I was using the toaster oven so I also got some in a pan. 

In the oven.

In a pan!


Or on a t-shirt with Bacon Man!

I might need to get one of those shirts. 

So when the bacon is done cooking, crumple it up and put it on top of the sausage.

Have a few cooked pieces for yourself.  You deserve it!  But eat them before they touch the uncooked sausage or take your chances if you're feeling lucky or stupid.

Now drizzle nizzle some bbq saucizzle on top of the bacon sausage bacon.  Add some more seasoning too if you feel like it. 

Here comes the fun and tricky part.  You have to separate the sausage layer from the bacon weave and roll the sausage up like so.

Roll up tight and close off the ends so it looks like a giant sausage or log.


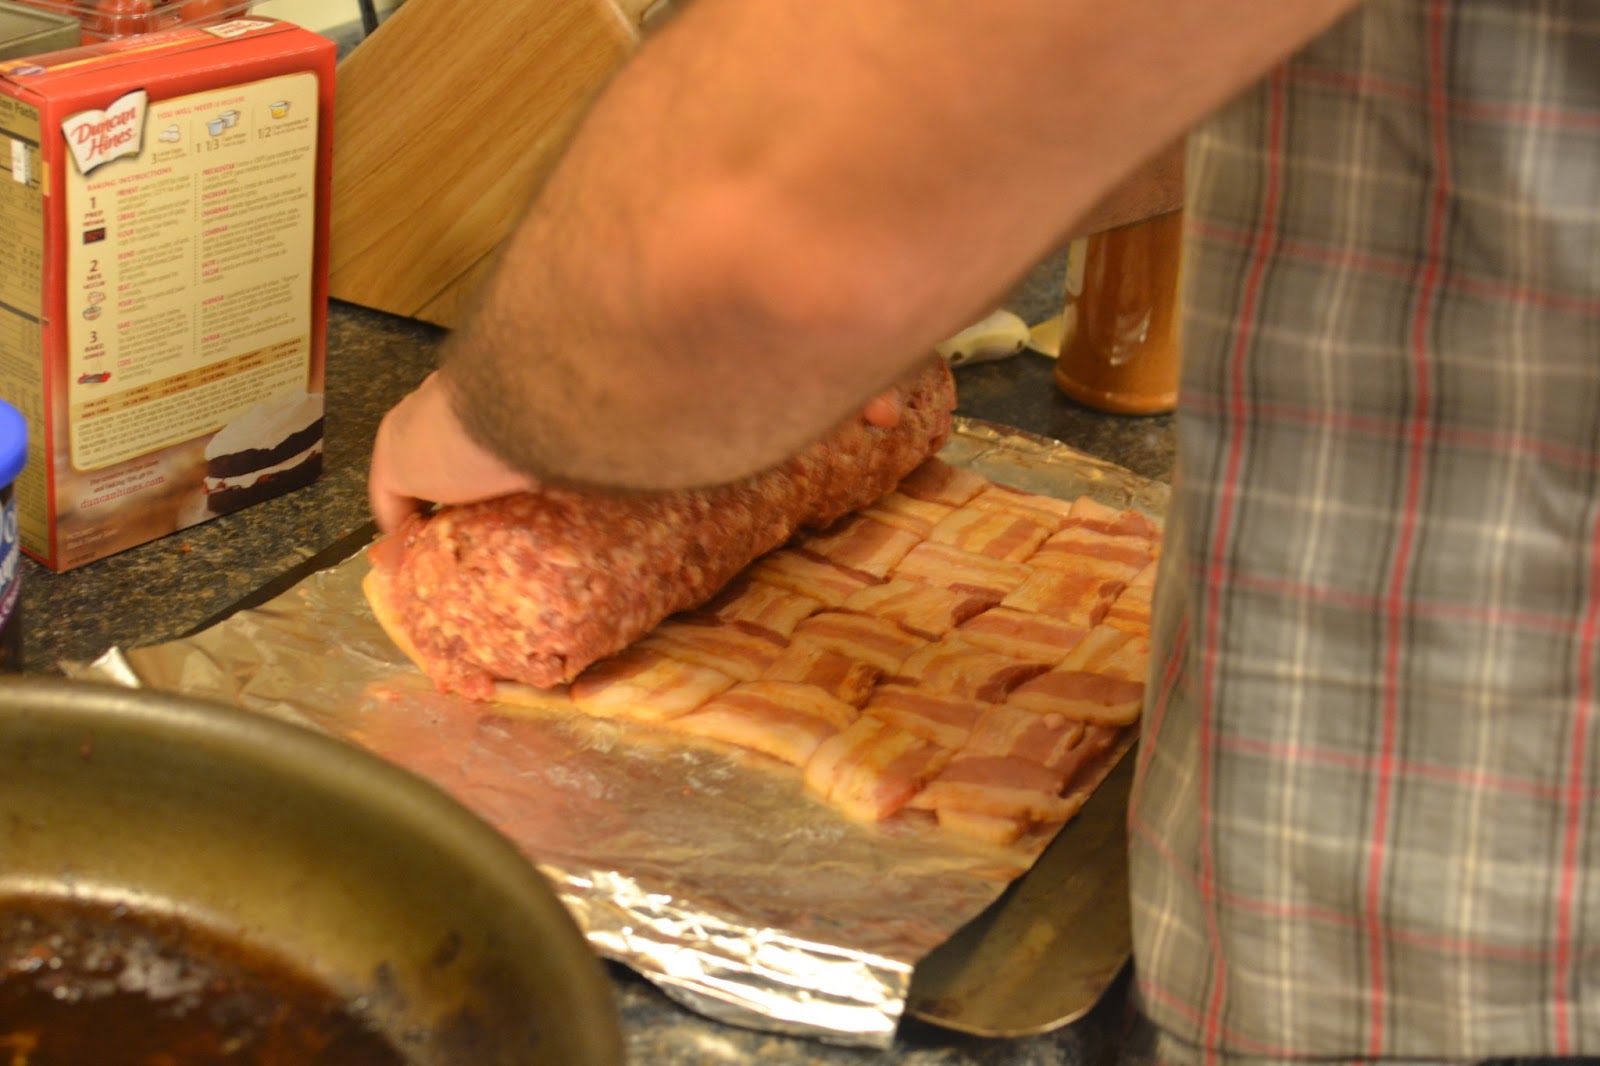
Then roll it back towards you grabbing the bacon weave to roll over the log.


Should look something like this.  Make sure that the ends are covered.  I had to add a few slices or uncooked bacon to cover the ends.  Guess I stuffed it with too much bacony sausage goodness.

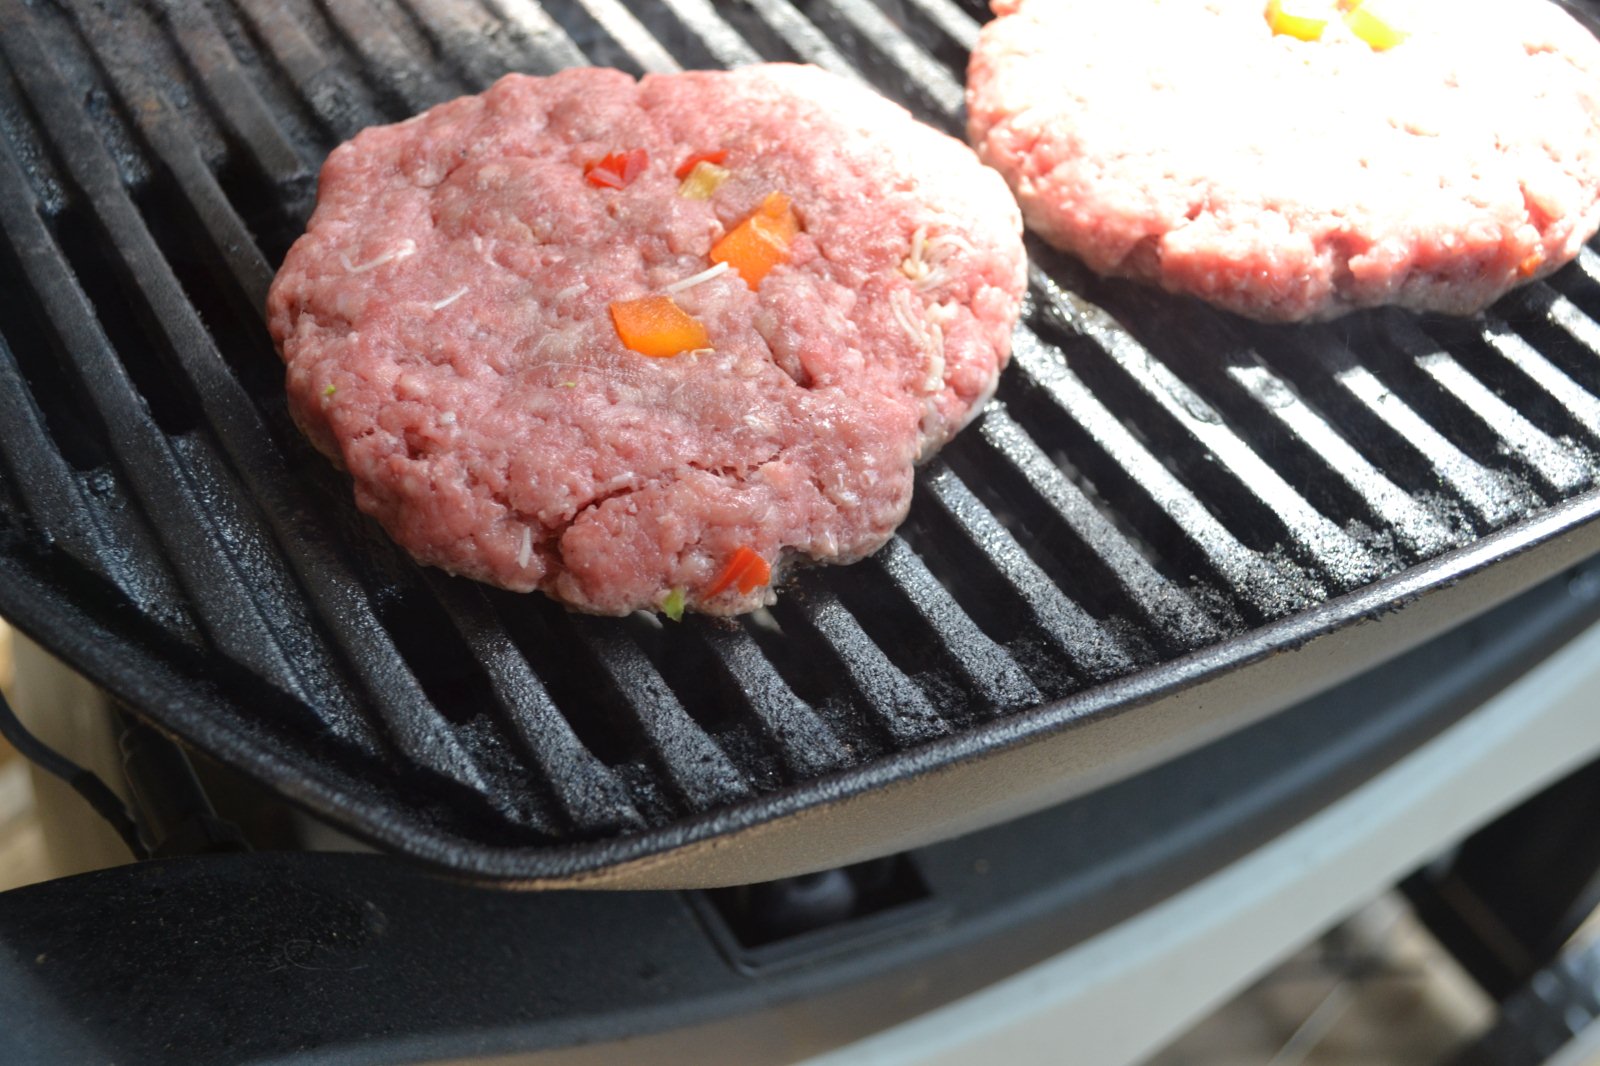
At this point it's ready to be cooked.  The official recipe says to smoke it in a smoker for about 2-3 hours or until done.  Living in a condo, I don't have a smoker.  Recently found out I'm not even supposed to have a grill but that's a matter for the local authorities.  I decided to see if I could get a temperature of 225 degrees on my gas grill.  After messing with the burners I was able to achieve this.

So it's more like 250 but close enough.  This is the Weber Q 300 or 320 in case you were wondering.

I think this is about 1 hour into cooking.  I kept it on the foil in fear it would stick to the grill.

Maybe 2 hours into cooking.  Getting there but not quite done. 


I think it took close to 3 hours and since I wasn't serving it until the next day, I wrapped it up in foil and put it in the fridge.  It took a lot of will power not to cut into it and give it a try but it was also 1am when I finished it so I was pretty tired.

The following day I reheated it in the oven for about 30 minutes and then put it on the grill with some bbq sauce to get a nice carmelization on it. 

Served alongside some bbq chicken.

Slice, serve, enjoy and repeat!
And yes, it tastes as good as it looks.  Maybe even better.  I had myself at least 2 servings, maybe 2.5 and then some leftovers the next day.  Goes well with eggs in the morning or anytime for that matter. 

I had a lot of fun making this meaty creation and I will probably make it again in the winter.  This time it will be at my new home with a real smoker in the backyard. 

Special thanks to Robin for taking pictures when my hands were covered in bacon.  And a special birthday shout out to my man Mel for encouraging me to make this for his birthday bbq. 

Coming up next, I chronicle another wondeful food creation.....

The Pie Cake!


Monday, August 15, 2011

Recipe #15 - Purple Potato Salad...that wasn't purple

We were invited over to the neighbors for some burgers they asked me to bring a side dish.  Being that I hadn't made a Tyler recipe since the infamous "Burning down the house chicken skewers," I decided it was time to see what simple side dishes were available. 

Option 1:  Shrimp Ceviche Served in Coconuts


While it looks pretty cool, I don't think it would have paired well with a burger.


Option 2: Wild Rice Pilaf with Nuts and Lemon


Interesting dish but I wasn't feeling wild.

Option 3:  Purple Potato Salad
(no picture available on foodnetwork.com)

Another one of those no picture recipes, but it seemed like the best choice to pair with the protein of choice.

So off to market to buy a fat pig.  Gotta buy a a pig.  Gotta have a pig.  

Sorry about that.  Been watching a lot of sesame street and there is a great skit where a weimeraner dog is dressed up like an old lady and goes to market to buy a fat a pig.  Just tried to find a video online to help with the visual but I couldn't so you'll just have to take my word for it that it's pretty awesome.  Now back to why I was really going to the market.

Here's the list of ingredients and recipe so you can follow along at home:

http://www.foodnetwork.com/recipes/tyler-florence/purple-potato-salad-recipe/index.html 

The main ingredient in purple potato salad is purple potatoes of course.  Where does one buy a purple potato?  Probably at whole foods or some specialty market.  Where did I go to buy them?  Stop and Shop.  Who didn't have any purple potatoes.  Yep, you guessed it, Stop and Shop.  So instead of heading over to whole foods which is miles and miles away from my little town, I decided to improvise and use red potatoes.  I hesitate to say red bliss because I think they were just red, no bliss.  Anywho, buy whatever potatoes you can find and I'm sure it will turn out fine.  Won't be purple but not sure you could taste the difference.  I think we'll need to have a potato taste test in the future!

Ingrendientos!  Red skin potatoes, red onion (recipe calls for purple onion but I couldn't find that either), spices, grey poupon (anything less would be uncivilized), celery, dill, lemon, parsley.   

First thing to do is get a good size pot of salt water on the burner.  Turn that shizzle up nice and high so we can get a boil going. 

Whole bunch of potatoes taking a bath in the bubbly.
While the potatoes are doing there thing, chop up the onion, celery, and parsley.

I'm really enjoying the color profile in this picture.  (Parsley is not pictured.  Sorry parsley, I'll get you next time.)

Next you can mix up the liquid ingredients with the spices and you'll get something that looks like this.

Check the seasoning and add salt and or pepper if needed.  I don't think I added any extra.

Take out the potatoes when they are fork tender.  Don't overcook since you don't want mashed potato salad.  Unless you do want mashed potato salad, then cook those mofos until they mash up easily.  I wonder if mashed potato salad would be good.  I don't see why it wouldn't.  Just a different texture and consistency. 

Cut the potatoes into bite size chunks and toss it with the dry and wet ingredients.  And voila!


Red Potato Salad!

Pretty easy recipe and didn't take more than 45 minutes.  I suggest making it ahead of time and refrigerating it to cool for an hour or two.  I'm not a fan of hot potato salad. 

Tasted great.  Had a bit of a kick to it from the cayenne.  If you don't like it spicy then cut back a little on the cayenne.  If you like it hot hot hot, then shake shake shake that cayenne on in it. 

Paired very well with the burgers and I would highly recommend this as a bbq side dish for any type of meat. 

Back by request and or demand is the 4 Clean Plate award!


and a random picture of Ally getting her drink on somewhere in Boston just cause she's awesome.


Next up :  A Special Non-Tyler Dessert and a Pork Extravaganza!


Monday, July 11, 2011

Recipe #14 and how I almost burned down the house

It's been a while since I've cooked a Tyler recipe and the people have been getting restless.  I've received messages like..

"where's Tyler?"
"You give up after 13?"
"I miss your food blog!  We need more recipes!"
"I love your pictures!  You're awesome and extremely good looking!"

And that's just a small sample of the thousands of fan mail I get on a daily basis.  So there are many reasons why I haven't blogged or cooked a Tyler recipe in a while.  Some of them, but not all, include playoff hockey, painting chairs, vacation, catching up on the DVR, and the traumatic experience of this recipe.  So without any further ado, I give you Recipe #14 and how I almost burned down the house.


not my house

So my neighbors were having a party for my other neighbors who recently moved.  I was asked to make something delicious so I decided to try one of Tyler's appetizer recipes, Chicken and Pineapple Skewers.

http://www.foodnetwork.com/recipes/tyler-florence/chicken-and-pineapple-skewers-recipe/index.html

It's rated easy, listed at just over an hour so I figured on a weeknight I had enough time when I got home from work at 5:45pm to make them for the 7:00pm party.  I had all the ingredients on hand.

Everything but the chicken.  I guess the chicken was too busy to make it to the photo shoot on time.   I'll have to speak with it's agent.


 Before getting into the cooking, soak the bamboo skewers for as long as possible.  

Soaked them in a large roasting pan.   It was either this or the bathtub.  Hard to find something long and deep enough to soak skewers in.

The recipe says to soak them for 30 minutes.  That's bull plop!  I soaked these for close to an hour and they still burned up on the grill.  I think you either need to use metal skewers or soak the bamboo for 3 days.  

So now that you've got the skewers in the pan or tub, you can move on to making the sauce.

Sauce in the pot with some large white glob on the right.  I think it's garlic.  That sounds more appetizing that a white glob so we'll go with that.
 
Fairly simple.  Follow the recipe and put them in a pot and let it simmer while you move on to the chicken prep. 

The recipe says to cut each boneless chicken thigh into 2 pieces.  Since there are no pictures I wasn't sure which way to cut the thigh, lengthwise or the other way.  So I took a guess and did it whichever way came out like this.

So this picture really doesn't show diddly squat about the way to cut the chicken.  Nice job on taking a picture of a mound of sliced chicken thighs on a bamboo cutting board.  I think you can cut the chicken either way.  Season with salt and pepper.

After the chicken is cut, move on to the pineapple.  Come to think of it, I believe I cut the pineapple first so I wouldn't have gross chicken hands while cutting the fruit.  I would wash my hands after handling the chicken regardless of the order.  Don't want to mess with the salmonella.  Haven't got it yet, don't plan on getting it in the future.

Sliced pineapple chunks.  Cutting a fresh pineapple is not a pretty job but the end result it worth it.  Don't even think about using canned chunks.  I'll permanently ban you from this blog and any future blogs.  I'll know.  I have people. 

Now that the ingredients are ready it's time to make up the skewers.  I went with chicken bottom and pineapple topper. 

Special thanks to the wife for taking this shot.  I wouldn't touch my camera with pineapple chicken hands.  I don't think I'd touch much of anything with pineapple chicken hands.  Now I'm picturing a guy with hands made of chicken and pineapples.  I hope it's cooked chicken cause that poor guy couldn't touch anything except maybe chicken. 


Almost ready to grill.  Just need some of the sauce.

I then brushed on some of the sauce not knowing what was in store for me when I went to the grill.  It was a mild June evening and the sounds of Malden traffic hummed in the background as I opened the screen door to the deck.  And there on the deck was my grill just ready for the chicken. 

The grill had been preheated to around 400 degrees and was ready to accept Tyler's bountiful chicken skewers which I had spent the past hour preparing.  The hour was nearing seven as I approached the grill and lifted the handle to reveal the grates of glory on which the chicken would achieve it's greatness.  And this is where it all started to go wrong.

I didn't want the chicken to stick so what I should have done was oil the grates before I started the grill.  What I did do was pour some vegetable oil on the grates not realizing that some of the oil went between the grates.  I put the chicken on the grill and closed the lid.

Within about 5 minutes there was a bit of smoke coming out of the grill and the temperature gauge was rising 500, 600, 650, 700 until it was maxed out.  I've had this grill for over a year and never seen it over 550.  I grabbed an oven mit and attempted to open the lid.  I didn't get far when I decided that was a bad idea.

I turned off the burners but the smoke continued to rise whilst the fire burned in the belly of the Weber beast.  I knew that the chicken was lost and my next and only move was to grab the fire extinguisher under the kitchen sink.  Never having used an extinguisher I quickly read the instructions.  I can't imagine most people read these when the time comes to use it.

Without lifting the lid I was able to shoot the foam into the sides of the grill which extinguished the flames and the smoke subsided.  Hours later when I opened the grill it looked like this.

It surprisingly doesn't look too bad in this picture.  And it still smelled pretty good too.
 
Looks like a sandstorm came along and got all up in my grill. 

Thank you fire extinguisher.  I now know how to use one and hope I never have to again.

Luckily I hadn't put all of the skewers on the grill, so I took the remaining ones upstairs to my neighbors and used their grill to properly cook them.

Me cooking the chicken without burning down the house.  I look a bit dejected from the recent experience.  I was.
This is what the chicken skewers should look like when cooked properly. 

And there you have it.  Recipe #14 and how I almost burned down the house.  While this business was more involved than it needed to be, the end result was fantastic.  Moist, tasty, succulent chicken with a tang of barbecue and the sweet touch of pineapple.  These were a hit at the party even though they came after most people had moved onto dessert.

Special thanks to Dave and Jenna for letting me use their grill and for taking the last two pictures.  Also for not calling fire department when they saw billows of smoke coming from the unit below them.  I've learned a valuable lesson here and I hope you have as well.  Don't pour oil onto a lit grill and always have a fire extinguisher at the ready.

What's next for Tyler's 100?  Not sure yet but I imagine it will be something indoors without an open flame.

Monday, June 6, 2011

Recipe #13 - Stuffed Bacon Cheeseburgers


http://www.foodnetwork.com/recipes/tyler-florence/stuffed-bacon-cheeseburgers-recipe/index.html

Memorial day weekend is upon us and what better way to celebrate or remember the day that with a cookout, right?  There are probably better and more patriotic ways to remember our fallen heroes so I mean no offense to anyone who has lost someone in the military.  And now some background information on this holiday.  According to Wikipedia:

Formerly known as Decoration Day, which was first recorded to have been observed by Freedmen (freed enslaved southern blacks) in Charleston, South Carolina in 1865, at the Washington Race Course, to remember the fallen Union soldiers of the Civil War. The recognition of the fallen victims was then enacted under the name Memorial Day by an organization of Union veterans — the Grand Army of the Republic (GAR)[2] — to honor Union soldiers of the American Civil War. Over time, it was extended after World War I to honor all Americans who have died in all wars. Now known as Memorial Day, it is a day of remembering the men and women who died while serving in the United States Armed Forces.[3]

http://en.wikipedia.org/wiki/Memorial_Day

For most people Memorial day is the unofficial start of the summer and we kick it off with one of my favorite ways to cook, the grill.  And what's more American than a burger on the grill?  Maybe a hot dog, or a beer, so let's have them all!  So I searched Tyler's recipes and found a simple Stuffed Cheese Burger recipe.  The ingredients are as follows:


Mustard (spicy brown), Foxy lettuce, tomato, Monterrey jack cheese, sesame seed rolls (so much better than plain rolls), 80/20 ground beef, premium bacon.   While the recipe doesn't call for 80/20 (20% fat) beef, Tyler mentions using this in the video on the recipe page.  I suggest giving it a watch. 


First step is to fire up the grill to a medium to high heat.  While the grill heats, now is a good time to cook the bacon.  I did it in the oven.


Bacon in an oven on aluminum foil cooking at 400-425.


Cook until it becomes crispy so you can chop it up like this.

Chopped crispy bacon on a pirate plate.  (Notice the X marks the spot in the top left).  Shiver me timbers of bacony goodness!

Now let's get the meat going.  Season it with salt and pepper and use your hands to mix it all together.  Make sure you wash your hands before and after or use some gloves, not winter gloves.  Once the meat is mixed up you want to make about 1/4 lb patties and use your thumbs to make an indentation in the middle.  Then add some of the chopped bacon like so.


Bacon in the middle.  Bacon in the middle. Wish I knew how to play a fiddle.


Now you add the cheese.


Cheese and Bacon sitting on the meat.  Looks so good I can't wait to eat!


While the recipe says to mix the bacon and cheese together in a bowl, I had some friends who could not eat the bacon so I kept the ingredients separate.  For their burgers, I put in brocolli and peppers.  So get creative and use anything that suits your palette.  


Peppers peppers, whose got the peppers? 


After you fill the meat with the cheese and bacon, you fold over the burger and mold it into a patty shape so they look something like this.


I added a little bit of the filling on top so I'd know what was inside each burger.


Now they are ready for the grill.


Bacon and Cheese on top and the mixed variety on the bottom.  Also note the mini size Ally burger in the middle.  She never ate it so it made a tasty snack the following day. 


Cook them about 8 minutes or so per side or more or less for desired doneness (I don't think doneness is a word but I couldn't think of another way to phrase it).  I tend to cook mine on the more medium well to well done side. 


Serve with lettuce, tomato, avocado, ketchup, mustard, mayo, honey mustard.....you get the idea. 

The finished product.  Realized after the fact that I should have taken a picture with it cut in half to see the middle.  Oh well, you'll have to just make it and see for yourself.
 
 I paired this with grilled asparagus

A little olive oil, salt and pepper.  Tastes great but makes my pee smell for a day.  Still worth it.

These burgers were a big hit with my guests.  Everyone received their correct order and there were no leftovers to speak of.   The first bite or two tasted like a regular burger but when you hit the middle and get that extra salty cheesy bacony bite, it all comes together and transports you to hamburger heaven.

Hamburger heaven! Or hamburgers after drinking red bull.

I highly recommend this recipe as it's quick, easy, tasty, and can be customized to anyone's diet.  This recipe recives 8 clean plates as there were 8 of us who ate. 


Next up: Chicken and Pinneapple Skewers
http://www.foodnetwork.com/recipes/tyler-florence/chicken-and-pineapple-skewers-recipe/index.html


And here's a pic of Ally in the kitchen just cause I always have a pic of her on these blogs.


That's my shirt, not her bathrobe.